
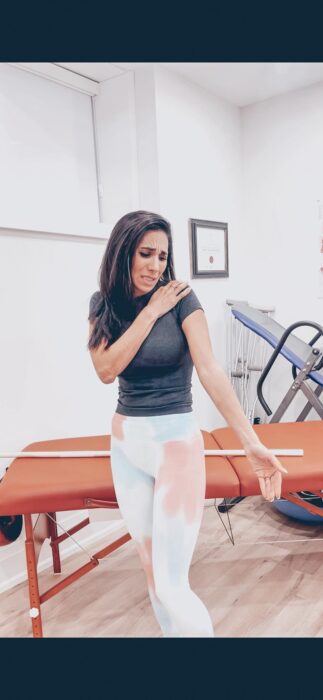
Frozen Shoulder Treatment
Frozen shoulder, or adhesive capsulitis, is a debilitating condition that affects the shoulder joint, causing stiffness, pain, and a decrease in range of motion. The exact etiology of this condition is not fully understood, but it is believed to be related to inflammation and scarring of the shoulder joint capsule. Risk factors for the development of frozen shoulder include diabetes, stroke, and heart or lung disease.
Physical therapy is an essential component of treatment for frozen shoulder. The primary aim of physical therapy is to reduce pain, improve range of motion, and restore normal shoulder mechanics and strength. A comprehensive treatment plan, tailored to the individual patient’s needs, is crucial for optimal outcomes. Initial treatment typically begins with passive range of motion exercises, performed by the therapist, to increase mobility in the shoulder joint. As the condition improves, active range of motion exercises, performed by the patient, are incorporated to strengthen the muscles surrounding the shoulder and improve overall function. Manual therapy techniques, such as massage and mobilization, may also be utilized to reduce pain and inflammation.
Additionally, the use of heat or cold therapy may be prescribed to manage pain and inflammation. As the condition improves, the physical therapy program will progress to include more advanced exercises aimed at improving strength, endurance, and proprioception. It is important to work with a physical therapist who is experienced in treating frozen shoulder, as they will be able to design a personalized treatment plan and monitor progress. Initiating physical therapy as soon as possible after the onset of symptoms and adhering to a treatment plan with yield the best recovery outcomes.
Failure to do so can result in prolonged recovery time and an increased risk of recurrence. Additionally, maintenance exercises, as prescribed by the physical therapist, should be continued even after the resolution of symptoms to prevent a recurrence. In conclusion, physical therapy plays a vital role in the treatment of frozen shoulder. With proper treatment, most individuals are able to regain normal shoulder function. Timely intervention and adherence to a comprehensive treatment plan are crucial for optimal outcomes.

Benefits and Tips for Stretching
Stretching is a critical aspect of physical fitness and daily life that can help improve flexibility, reduce pain, relieve joint compression, reduce muscle tension, and increase the overall range of motion. It can also be a helpful way to relax and unwind after a long day or strenuous exercise. There are various types of stretches, each with their own specific benefits and purposes.
Static stretches, which involve holding a position for a set period of time (usually 15-30 seconds), are effective for targeting specific muscles and are often used as part of a cool-down routine. Dynamic stretches, on the other hand, involve moving through a range of motion, such as leg swings or arm circles. These stretches are ideal for warming up the body before physical activity and can enhance overall flexibility. It is essential to stretch safely and correctly to avoid injury.
Some guidelines to follow include
1. Gradually increasing range of motion and avoiding sudden, jerky movements
2. Stretching to the point of tension but not pain
3. Holding each stretch for at least 15-30 seconds, with several repetitions for a total of 2 minutes per muscle group
4. Breathing deeply and relaxing while stretching
5. Stretching both sides of the body equally
6. Warming up before stretching, especially if muscles are cold Physical Therapists prescribe stretches as part of an overall treatment program, in order to achieve muscle balance and optimize movement mechanics.
Your Physical Therapist can advise on which muscles to stretch, and in what way, in order to address any aches and pains you may be experiencing!
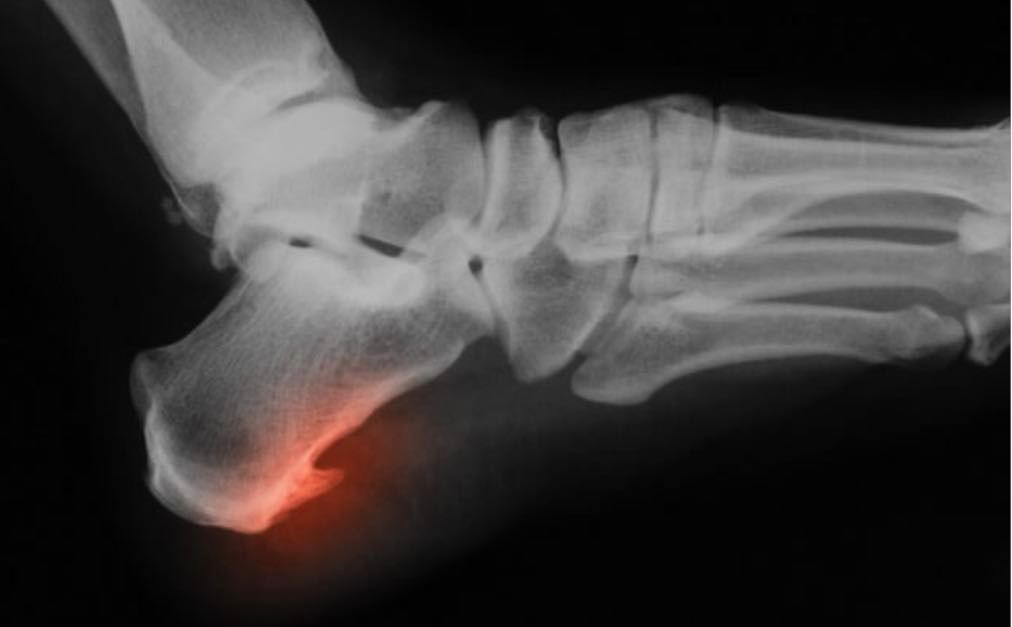
BONE SPURS FROM PLANTAR FASCIITIS
Often presenting as calcaneal spurs, bone spurs occur when there has been repeated trauma in the foot. They are the result of micro-tears in the connective tissue attaching to the heel, which can further develop into boney outgrowths. This commonly occurs at the heel where the plantar fascia inserts onto the bone. While most people complain of pain and discomfort, there have been cases with no symptoms at all.
Bone spurs are commonly the result of flat feet (pes planus), but are also affected by heredity, metabolic disorders, increased inflammation in the body, and other diseases. Risk factors: Those who have repeated trauma around the foot, inflammation in the peroneal muscles, deformities in the ankle area, severe disease (inflammation on the calcaneal due to overworking). Diagnosis: A physical therapist would be able to determine the likelihood of a bone spur based on a clinical examination. X-rays and MRIs would confirm the presence of bone spurs. There are tiers 1-3 of how severe the bony outgrowth can be.
Tier 1 would take up to 6 weeks for healing, tier 2 would take 6 months and tier 3 would take 6 months also but would require a different type of treatment. Treatments Bony spurs can be treated with traditional physiotherapy by increasing the strength around the surrounding muscles and lengthening those muscles as well. However, sometimes radiation, shockwave, laser, and cortisone shots are needed. Other therapies such as hot and cold can also treat the area. Wearing foot splints during sleep can also help prevent the bony spurs from getting worse, and shoe inserts or foot orthotics may also be beneficial. A physical therapist can help you determine the optimal treatment for your specific body’s alignment, functional status, and body tissues.
Jumpers knee
Jumper’s knee or the medical term patellar tendonitis is inflammation in the tendon that attaches the tibia (shin bone) to the patella (knee bone). The tendon generally gets inflamed in athletes, and less commonly in non-athletic individuals. The chronic inflammation in the tendon is due to the repeated motions of knee bending and landing on hard surfaces. The impact of running and jumping in a suboptimal human mechanical system puts additional strain on the tendon leading to inflammation and micro-tears.
Symptoms of jumper’s knee include swelling in a tendon area, pain on jumping, walking, or running, pain when bending or straightening leg, tender to touch. A physical therapist can diagnose jumpers knee through their clinical exam.
Treatment for jumpers knee may include rest, anti-inflammatory medication, ice. However, the most important treatment is found within a physiotherapist’s specific exercise prescription for the individual’s body. This exercise prescription is unique to the person’s movement strategies and aims to unload the tendon by strengthening and stretching surrounding muscles. Many times eccentric quadriceps exercises are prescribed.
It is advised for patients to reduce their athletic involvement while symptoms are acute and inflammation is active. A physical therapist can help guide appropriate activity levels throughout the rehab process
Postpartum and Pregnancy Physiotherapy
by Christine Toma, MPT
Physical Therapists can play an integral role in a healthy pregnancy and postpartum recovery. Here’s How:
1. Physiotherapists understand how to coach you in preparing your body for the changes pregnancy brings; from weight gain to ligament laxity, to a widening pelvis, to increased pressure on the pelvic floor. Your physiotherapist can make personalized recommendations to help reduce potential injuries, aches, and pains while also giving you an exercise prescription to maintain strength for a healthy pregnancy.
2. Urinary incontinence, painful intercourse, and back pain are all common struggles faced during the postpartum period. Your physical therapist can help coach you to restore muscle harmony around your pelvic floor and nip these issues in the bud.
3. After giving birth, the body needs guidance to return back to pre-pregnancy activities. This is because your body, controlled by changing hormones, is recovering from major physical changes. Your physical therapist has the skills to guide you according to your tissues phase of healing. They will examine and analyze your movement mechanics, core stabilization, etc to identify any sub-optimal movement strategies that would put you at risk of injury. Physical Therapists will guide you to a safe return to activity, sport, and exercise while helping you optimize your muscle balance and movement to take care of your baby.
4. In the case of pelvic organ prolapse and urinary incontinence, your pelvic physiotherapist can do manual therapy and provide you with strategies for management and recovery.
5. Your physical therapist can make recommendations regarding body mechanics for caring for your baby during carrying, changing, feeding, etc.
Abdominal Core Muscle Exercises
Muscle Exercises; from transversus abdominus to rectus abdominus
The core is the area between the diaphragm and the pelvic floor. When we think of the abs, often the 6 pack comes to mind. But it’s much more and includes the diaphragm, pelvic floor, multifidus (deepest back muscle) and the transversus abdominus (deepest ab muscle).
These support the more exernal muscles by providing a stable base to move off of. If they’re not functioning synergistically with the superficial core, we can’t control movement around the back and pelvis. This can often lead to pain, injury, and a belly pouch (especially postpartum moms!) While this is a topic far too great for a blog post, we can introduce the concept. The deep core muscles aren’t action muscles, so we use imagery to help activate them and use our fingers to help feel for proper contractions.
Here, we focused on activating the transversus abdominus.
- A quick way to assess if you naturally activate this muscle is to lift your head off the floor and see if your abs dome. If they do, it means the TrA isn’t providing a stable base for your 6 pack muscle (rectus abdominus) to move off of
- Learn to activate the TrA. Imagine a line that connects the inside of your two pelvic bones (front of hips). Think about connecting, or drawing the muscle, along this line as if closing two book covers.
- When you can activate the TrA, add a head lift to challenge the synergy between the 4 ab layers. When this is mastered (ie your belly stays flat, no doming, TrA is activated), lift your shoulders also.
- If you have mastered steps 1-3, you can move into controlled fitness movements. Remember, your abs need to stay flat and controlled in this new position. Try a modified mountain climber but keep your movements slow and controlled. Synergistic ab activation is the goal, not speed.
- Now add the challenge of moving both arms and legs on the stable base of a well-activated core. Try the dead bug, monitoring your abs for shape and control
Full Spine Mobility
Mobility refers to how much movement a joint has. It is the foundation for how easily you can move to perform daily functions like walking, cooking, working, bathing, etc. Our spine is the foundational base for the movements of our whole body. When our spine is in pain or not functioning optimally, it can be quite debilitating. The spine is comprised of 24 vertebral segments connected by joints.
Since we are creatures of efficiency, we always use the path of least resistance. This means that we choose to move through the joints that are easiest to move. So, certain spinal joints will have more mobility/movement and other segments will have less. If a spinal joint moves too much, it predisposes us to injuries such as disc bulges, sciatica, arthritis, etc. We have to learn how to use our whole spine to move, rather than bearing the load on only a few spinal areas.
The good news is that mobility can be trained. But of course, the younger you are, the easier it is. Mobility training requires us to connect with how our bodies move, and readjusting our coordination. I have demonstrated whole spinal mobility in a variety of positions (quadruped, sitting, standing) since we I have demonstrated whole spinal mobility in a variety of positions (quadruped, sitting, standing) since we function in a variety of positions.
Exercises: Keep movements slow and controlled. Try each one for 30 seconds.
1. Quadruped whole spine mobility
2. Thoracic Mobility (where most people are quite stiff)
3. Seated whole spine mobility
4. Lumbar Mobility
5. Standing whole spine mobility
SI joint treatment
The Sacroiliac joint is where the pelvic bone meets the base of the spine. It is the most stable joint in the body to the point that many anatomy scholars believe it is fused. So why do so many people have pain here? Well, although it’s an incredibly stable joint, micro shifts can be possible (kinda like having something stuck between your teeth).
This makes the joint unhappy, leading to inflammation and muscle spasm. Issues in the SI joint tend to be more prevalent among pregnant or postpartum women as their ligaments are more lax. But it can also be an issue for other people such as those who have generally hyper mobile joints, or those who have experienced blunt trauma.
Personally, I’ve experienced both pregnancy and blunt trauma, both of which led to chronic SI joint issues for me. Luckily, there’s lots that can be done for this condition! Here I’m sharing just a couple self correction techniques and in my opinion, the most important muscle strengthening exercises.
Now I know many of you have heard of the rotator cuff muscles for the shoulder. But did you know the hip also has a rotator cuff? Since these muscles cross and stabilize the SI joint, it is imperative to make sure they’re activated to do their job.
1. Muscle energy technique using the hamstrings to rotate hemipelvis posteriorly
2. Muscle energy technique using the adductor muscles to rotate hemipelvis anteriorly
3. Deep hip rotator exercise. Make sure knee is higher than 90 to prevent the hamstrings from taking over this movement and keep the heel close to the edge of the bed/couch. Try 5-10 reps slow and controlled
4. Cuff of Hip exercise. This is different than the classic clamshell exercise as we are not targeting glute max. Keep your knees higher than your hips, and don’t allow yourself to roll backward as you elevate your knee. Try 8-10 reps slow and controlled
See Instagram post for demo SI joint treatment
Disc Bulge Treatment
This video demonstrates the “McKenzie Method” – a series of exercises intended to improve disc position and provide back pain relief. The McKenzie Method is a series of progressive positions designed to encourage your disc back into its proper place.
However, if your disc is acute, you may not be able to work through all stages straight away. In this case, work through as many stages as you can, and only progress further as your pain subsides. It is expected that each stage will be somewhat painful until it achieves its goal. So what is a bulged disc anyway? A bulging disc is when a disc is compressed and bulges outward into the column that’s normally occupied by the spinal cord. This can be a natural result of ageing, but in some people it can be quite painful and debilitating. Because it is considered degenerative, there is usually a progressive, gradual onset of symptoms.
It can ultimately cause pain/numbness/tingling in the buttocks, legs, or back. In more advanced stages, it can also affect one’s ability to walk. Trying McKenzie’s Method can mitigate the situation by encouraging the disc back into place and relieving pressure off nerves. These exercises can be painful as your body adapts to each level. Don’t move to the next level until the one you’re at is no longer uncomfortable. But as always, a full self-directed therapy program should be developed with the guidance of a physiotherapist.
Stress Management to Optimize your Healing
Stress Management is an integral part of healing from injury. The effects that stress has on the body impedes its natural healing process and can significantly slow it down.
Research suggests that taking measures to reduce overall psychological stress can prevent stress-induced impairments in a physical healing. Here are some suggestions to manage stress in order to optimize your physical recovery:
-Take a time-out. Immerse yourself in nature, do some stretches, take a walk, ride a bike, meditate, get a massage, do some organizing…Stepping back from the problem helps clear your head.
-Eat well-balanced meals. Do not skip any meals. Do keep healthful, energy-boosting snacks on hand.
-Limit caffeine intake since it can aggravate anxiety.
-Get enough sleep. When stressed, your body needs additional sleep and rest.
-Exercise daily to help you feel good and maintain your health.
-Take deep breaths. Nose inhale and count to 10. Mouth exhale slowly. Repeat.
-Reset your perspective. Be proud of your accomplishments instead of disappointed in your failures and take them as notes for improvement next time. Continual improvement can be even more satisfying than initial success.
-Welcome humor. A good laugh goes a long way.
-Think of others. Volunteer or find another way to help someone. The act of selflessness and removing your focus from your personal anxieties can help give you a break from your everyday stress.
-Learn what triggers your anxiety. Is it work, family, school, or something else you can identify? Write in a journal when you’re feeling stressed or anxious, and look for a pattern.
-Talk to someone. Tell friends and family you’re feeling overwhelmed, instead of bottling it up.
